Online High School Art Classes: Photograph Work for Feedback
A dark shadow across a drawing can make a careful pencil gradient look like a rough smudge. Before submitting work for an online art class, check whether the photograph shows what a teacher needs to judge. Paper, a glossy painting, and a three-dimensional object each call for a slightly different arrangement of light, camera, and background.
Why Photographing Artwork Matters in Online Learning
In traditional classrooms, art teachers walk around the studio, observing brushwork, texture, and composition up close. In online high school classes, that physical presence is replaced by digital documentation. The photograph becomes the artwork's proxy. If the image distorts color, scale, or detail, the feedback will reflect those inaccuracies. A student might spend hours on a charcoal portrait only to receive comments about 'faded contrast'—not because the contrast is weak, but because the photo was taken in dim light.
Consider Maya, a 10th-grade student enrolled in an online drawing course. She created a detailed pencil sketch of an urban streetscape, emphasizing perspective and shadow. When she submitted a photo taken with her phone flashlight on, the highlights washed out the midtones. Her instructor suggested she 'strengthen the value range,' which confused Maya—she had worked deliberately on tonal gradation. Only after resubmitting a properly lit image did the instructor recognize her skill and offer targeted advice on line weight. This example shows how technical presentation directly affects educational outcomes.
Setting Up for Flat Art: Drawings, Paintings, and Collages
Flat artwork includes pieces on paper or canvas up to about 18 by 24 inches. Photographing these correctly requires attention to lighting, alignment, and background. The goal is a neutral, distortion-free image that preserves the artwork's original proportions and color.
Use Natural Light When Possible
The best light source for photographing flat art is indirect daylight. Avoid direct sunlight, which creates glare and hotspots. Position the artwork near a north-facing window (in the Northern Hemisphere) during midday, when light is most consistent. If natural light isn't available, use two identical lamps placed at 45-degree angles on either side of the artwork to minimize shadows.
For example, 11th-grade student Jordan used two desk lamps with daylight-balanced bulbs (5000K) to photograph a watercolor series. By placing each lamp equidistant from the painting and slightly behind the camera, he avoided cast shadows and preserved the delicate washes. The resulting images allowed his instructor to comment on pigment blending and paper texture—details that would have been lost under a single overhead light.
Eliminate Glare and Reflections
Glare occurs when light bounces off glossy surfaces. To reduce it, tilt the artwork slightly or rotate it until reflections disappear from the viewfinder. Never use a camera's built-in flash; it creates harsh highlights and distorts color. If the artwork is framed under glass, remove it if possible. If not, photograph at an angle where reflections are minimized, then correct perspective in post-processing (see below).
Align the Camera Perpendicularly
Holding the phone or camera at a perfect 90-degree angle to the artwork prevents keystoning—where the top of the image appears narrower than the bottom. Use the grid feature on your phone's camera app to align the edges of the artwork with the gridlines. Stand back far enough so the entire piece fits in the frame without cropping.
Choose a Neutral Background
Use a plain wall or large sheet of white or gray paper as a backdrop. Avoid busy patterns or bright colors that distract from the artwork. The background should support, not compete with, the piece.
Post-Processing Basics
After capturing the image, use free tools like Google Photos or Apple Photos to make minor adjustments:
- Brightness: Adjust so whites are not blown out and shadows retain detail.
- Contrast: Increase slightly if needed, but avoid over-enhancement.
- Crop and Straighten: Use the perspective correction tool to fix alignment if the camera wasn't perfectly perpendicular.
- Color Balance: If colors appear too warm or cool, use the white balance tool to neutralize.
These edits should be subtle. The goal is accuracy, not artistic reinterpretation.
Photographing Three-Dimensional Art: Sculptures and Mixed Media
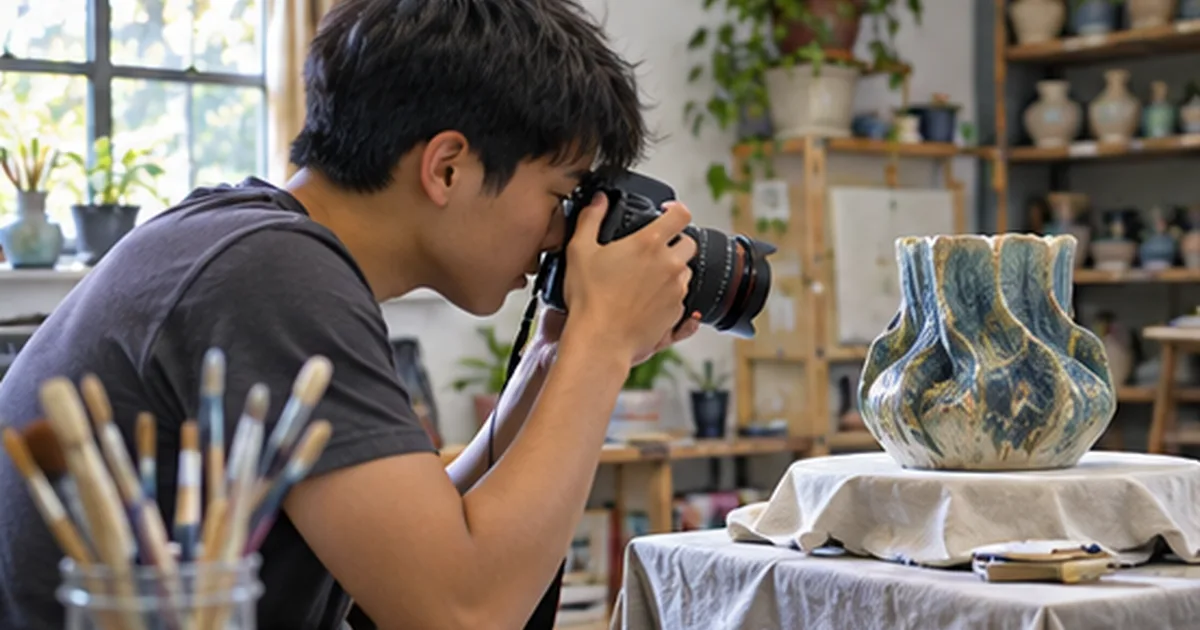
Three-dimensional pieces present unique challenges: depth, multiple viewing angles, and surface texture. A single photo won't suffice. Students must provide multiple views and contextual information to convey the full experience.
Determine Essential Viewing Angles
For most sculptures, submit at least three images: front, side, and oblique (angled) views. If the piece has notable features on the back or underside, include those as well. For example, 9th-grade student Eli created a clay relief sculpture with intricate incised patterns on its reverse. By including a photo of the back, he enabled his instructor to assess the full compositional strategy, not just the front-facing form.
Use a Turntable or Marked Surface
To maintain consistent positioning, place the sculpture on a lazy Susan or a piece of paper with directional markers (front, back, left, right). Rotate the piece, not the camera, to capture each view. This ensures uniform distance and angle, making comparisons easier for the reviewer.
Include a Scale Reference
Dimensions matter. A small sculpture may appear larger in a photo without context. Place a ruler or common object (like a pencil) next to the piece in one image. Crop it out after photographing if needed, but keep the measurement data on file. For instance, when 12th-grader Zoe submitted photos of a wire-and-fabric installation, she included a shot with a ruler beside it. Her instructor noted that the delicate scale influenced how the shadows were interpreted in the feedback.
Lighting for Dimension and Texture
Unlike flat art, three-dimensional work benefits from directional lighting to emphasize form. Use a single light source at a low angle (raking light) to reveal texture. For smooth surfaces, diffuse the light with a sheet of tracing paper or a white cloth to avoid harsh shadows.
For a papier-mâché mask project, student Diego used a desk lamp with a translucent shade positioned at 30 degrees to the left of the mask. This created subtle shadows across the contours, helping his instructor evaluate depth and proportion. He avoided overhead lighting, which flattened the features and obscured the sculptural intent.
Document the Environment When Relevant
If the artwork is site-specific or meant to be viewed in a particular setting (e.g., a shadow piece that changes with light position), include a contextual photo showing placement. This helps instructors understand the conceptual framework. However, keep the primary submission focused on the object itself.
Common Mistakes and How to Avoid Them
Even with good intentions, students often make technical errors that compromise image quality. Recognizing these pitfalls improves consistency.
- Overzooming: Digital zoom reduces resolution. Instead, step back and crop later.
- Dirty lenses: Wipe the phone camera lens before shooting. Smudges blur fine details.
- Incorrect white balance: Auto settings can tint images yellow or blue. Use the 'daylight' preset if available.
- Cluttered backgrounds: Avoid photographing on patterned rugs or near bookshelves. These distract from the artwork.
- Submitting screenshots: Never submit a photo of a computer screen displaying the artwork. Screen glare and pixelation degrade quality. Photograph the physical piece directly.
Submission Protocols and File Management
Once images are ready, students should follow course-specific guidelines for file format and naming. Most online high school classes accept JPEG or PNG files. Name files clearly: LastName_ProjectName_View.jpg (e.g., Chen_SelfPortrait_Front.jpg).
Keep original high-resolution files in a dedicated folder. Instructors may request higher-quality versions if details are unclear. Compressing images too much for faster upload can sacrifice critical information. Aim for a balance: a file size under 5 MB but with sufficient resolution (at least 150 dpi at full size).
Example Workflow: From Studio to Submission
Here’s how 10th-grader Amara prepares her artwork for review:
- Completes a mixed-media piece on canvas (16" x 20").
- Positions it on an easel near a window at 11 a.m., ensuring even light.
- Turns off overhead lights and phone flash.
- Uses the grid feature on her phone to align edges.
- Takes the photo from arm's length, using volume buttons to avoid shake.
- Reviews the image: checks for glare, alignment, and color accuracy.
- Edits slightly in Google Photos—straightens perspective and adjusts brightness.
- Saves as Amara_MixedMedia_Final.jpg.
- Uploads to her course portfolio, along with a brief artist statement.
This methodical approach ensures her creative effort is seen as intended.
Supporting Growth Through Clear Documentation
Photographing artwork is not just a technical task—it's part of the learning process. By documenting their work thoughtfully, students develop observational skills and attention to detail. They learn to see their pieces through an outsider's eyes, a crucial step in artistic development.
When feedback is based on accurate representations, it becomes more actionable. A student might realize their brushwork reads differently in photo form, prompting reflection on surface texture. Or, seeing a sculpture from multiple angles may reveal asymmetries not apparent during creation.
For families considering homeschooling with an arts focus, consistent documentation also builds a reliable portfolio over time. Colleges and programs often request visual records, and well-photographed pieces can demonstrate artistic ability and attention to presentation. Roovet Academy supports families by providing course options that may help in portfolio development.
In online high school classes, where interaction is mediated through screens, the quality of visual submission shapes the entire educational exchange. A well-photographed piece invites deeper engagement. It tells the instructor, 'This is what I made, and I want you to see it clearly.' That clarity is the foundation of meaningful feedback and real artistic growth.
Explore the Roovet Academy course catalog.